 If using an uploaded map
Step 1 – On the admin panel, click on in the sidebar menu
Step 2 – Find your zone in the list and click on the button
Step 3 – Drag and drop the Space Selector to the map (see image)
Step 4 – Tick the box Meeting Room
Step 5– Give a name to your meeting room (try to keep it short), select the maximum capacity, and click on
Step 6 – Click on the shape to move it and resize it
- Move: Click on the shape, hold down and drag
- Resize: Mouse over the borders, your cursor will change (from a hand to a double arrow), click, hold down and drag
- Rotate: right-click on the square, then choose “Configuration”, change the value of “Rotation” and click on “Save”

If using a built map
Step 1 – On the admin panel, click on in the sidebar menu
Step 2 – Find your zone in the list and click on the button
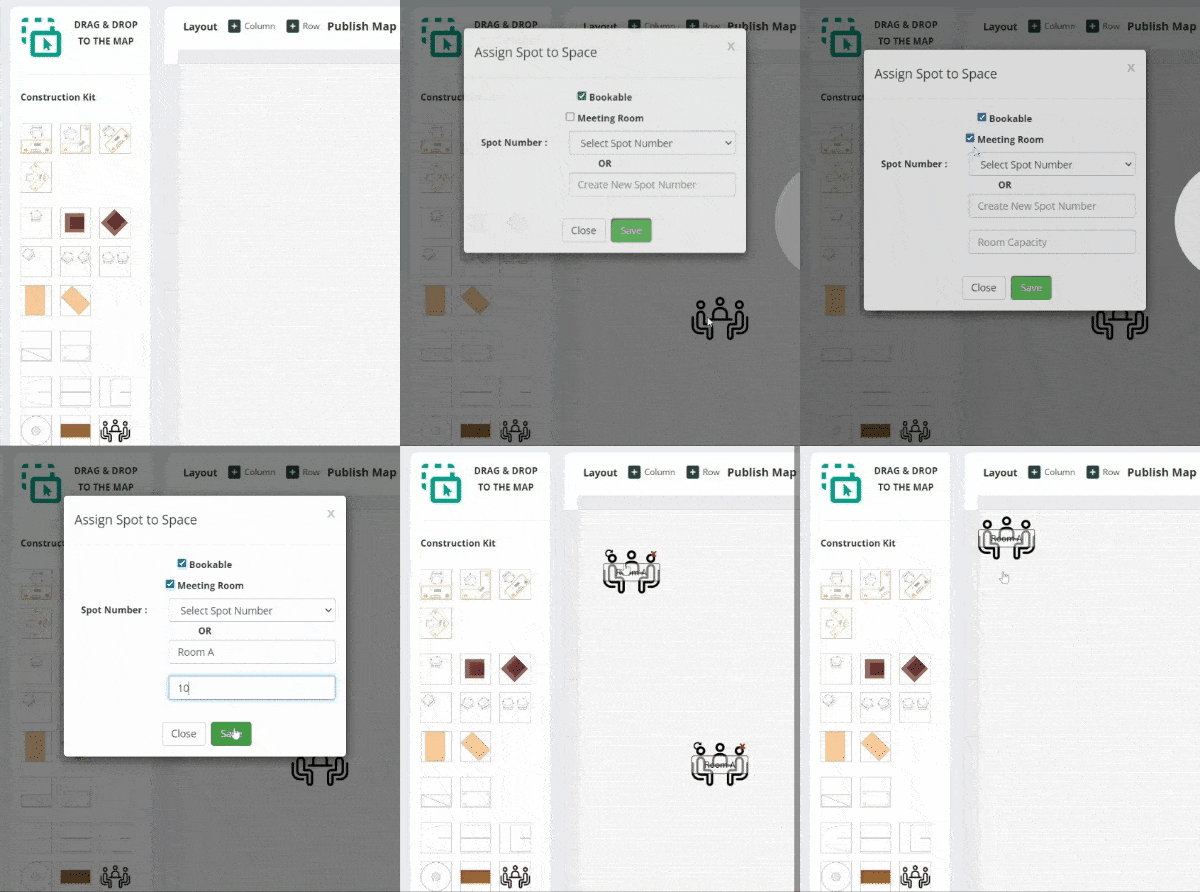
Step 3 – Drag and drop the meeting room icon to the map (see image)
Step 4 – Give a name to your meeting room (try to keep it short), select the maximum capacity, and click on
Step 5 – Click on the meeting room to move it and rotate it
- Move: Click on the shape, hold down and drag
- Rotate: Click on the arrow in the top left corner
