From the app

Step 1 – On the Ronspot mobile app, press on the second icon in the bottom navigation bar to access the booking calendar
Step 2 – Tap on any day, this will open a new pop-up window
Step 3 – Tap on *
*If the option doesn’t show, switch to a different zone with at least one meeting room
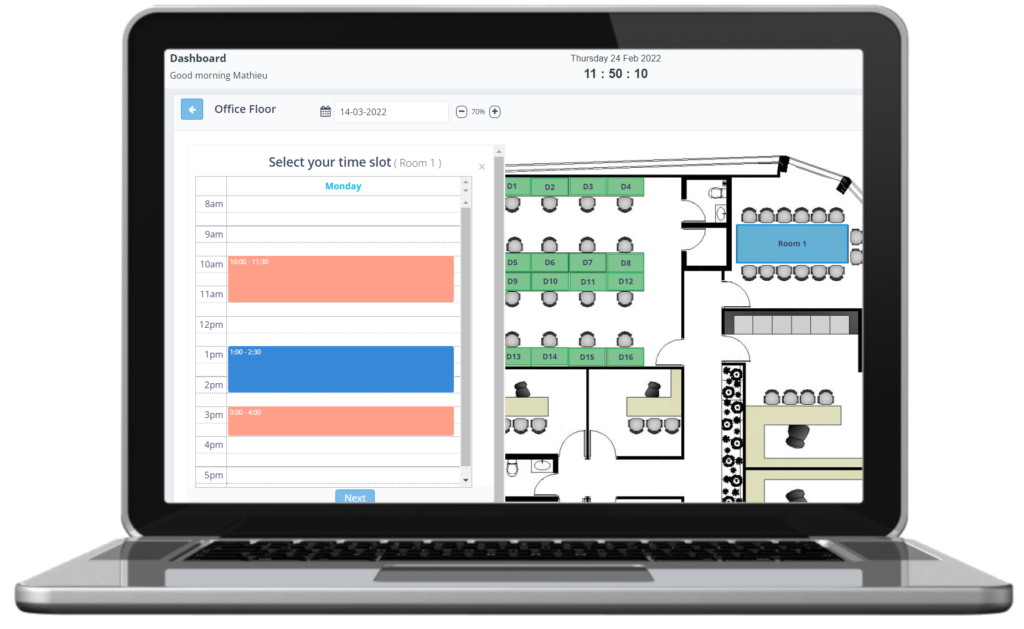
Step 4 – On the next screen Select Time Slot, you will be presented with a time grid for the first meeting room. Use the drop-down at the top of the page to view the availability of other meeting rooms. Availability is shown as follows:
- Available timeslots
- Unavailable timeslots
- Your selected timeslot
Step 5 – Tap on a white cell, hold down and drag down to select your timeslot (see image 1):
Step 6 – Click on
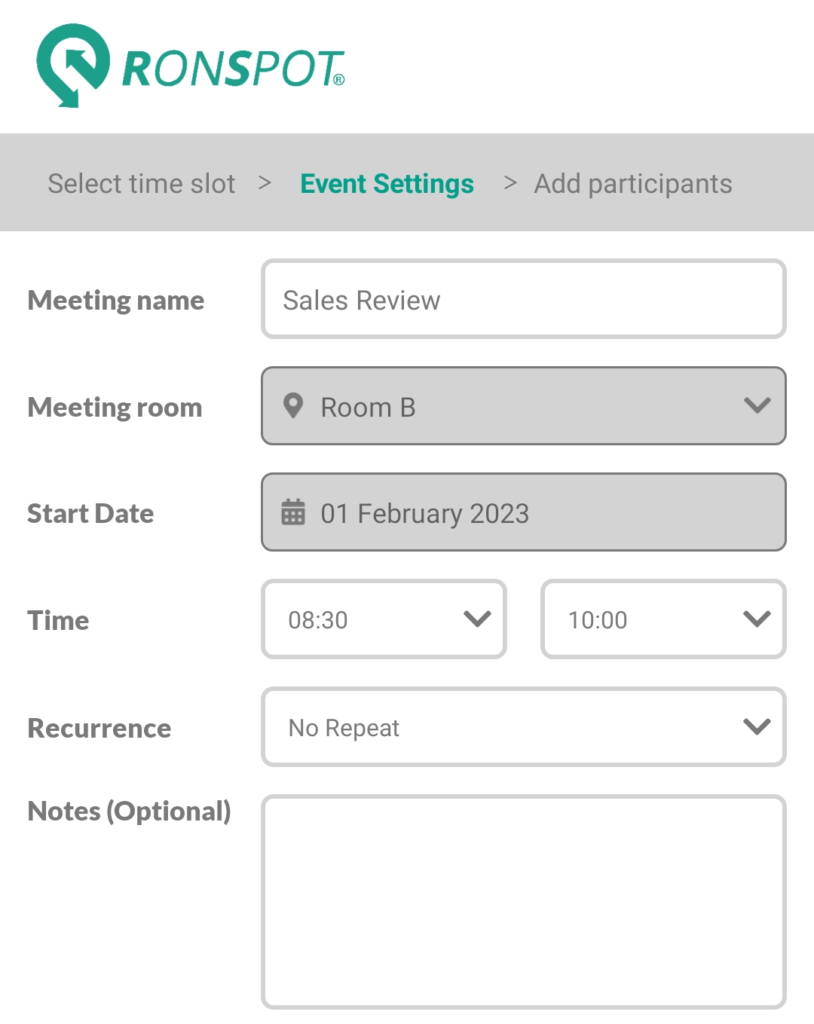
Step 7 – On the next screen Event Settings, configure the following fields:
- Meeting Name — Give a name to your meeting
- Time — Review the selected start and end time
- Recurrence — You have the choice between:
- No repeat
- Daily repeat
- Weekly repeat
- Monthly repeat
- Notes (optional)
Step 8 – Click on

Step 9 – On the next screen Add Participants, click on
Step 10 – Type the first letter of a name to search for a colleague and add it to the participant list
Step 11 – Repeat the previous step to invite other colleagues
Step 12 – Click on
From the web portal
Step 1 – On the web portal, select a zone with a meeting room (use the Zone drop-down in the top right corner)
Step 2 – Click on an available day ![]() in the calendar to access the map
in the calendar to access the map
Step 3 – Click the meeting room you wish to book. This will open a pop-up calendar, showing you when that meeting room is free to book throughout the day (unavailable timeslots will be shown in red).
Step 4 – On the next screen, choose the time you wish to book the meeting room for by clicking the time slot. To extend the duration of the meeting, click and drag the mouse down for the duration you wish to meet. Then click .
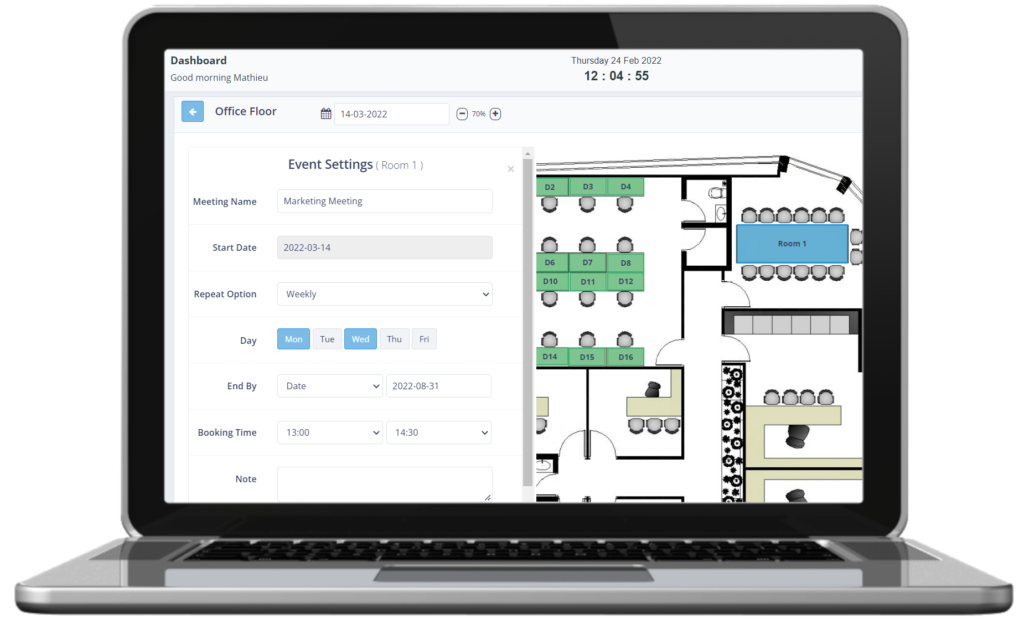
Step 5 – Next you will update the meeting details
- Meeting name
- Repeat option: You can choose how often you wish to repeat the meeting here. You may choose to do daily, weekly, monthly, or as often as you wish.
- End date: You can also choose an end date for this recurring meeting (this is good for project meetings that will eventually end).
- Booking time: You also have the option to amend the length of the booking if you wish.
- Notes
To continue, click .
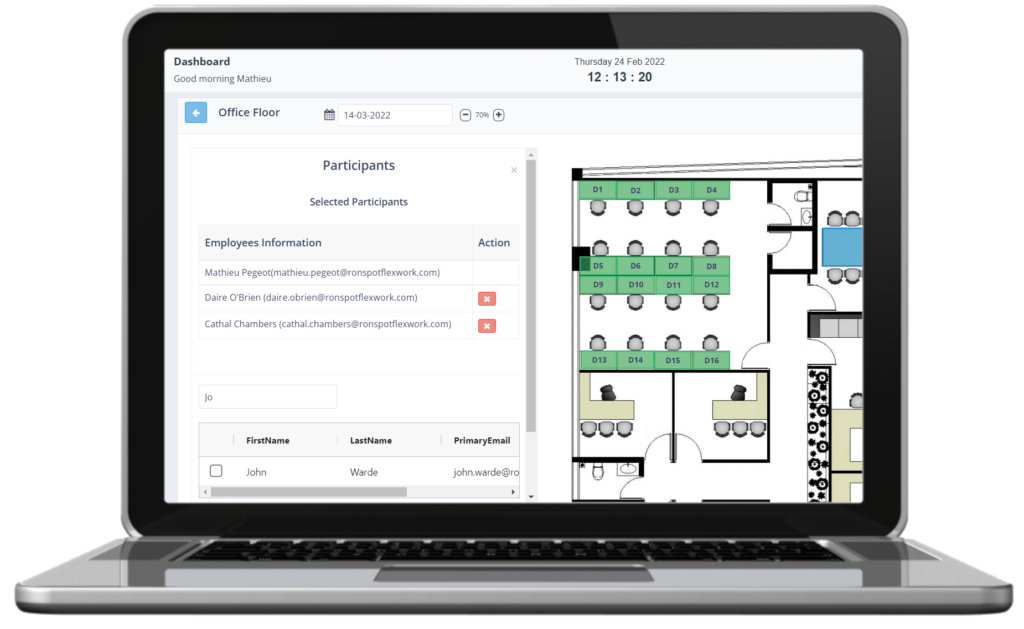
Step 6 – Add meeting participants
- Type the name of your fellow employees in the search box
- Check the box
 beside their name to add them to this meeting. To remove a participant, simply click the
  button in the participant list.
 - Once you’ve added all your participants, click .