 If using an uploaded map
Step 1 – On the admin panel, click on in the sidebar menu
Step 2 – Find your car park in the list and click on the button
Step 3 – Drag and drop the Space Selector to the map (see image)
Step 4 – Give a number to your parking space (keep it short, 2-3 characters max) and click on
Step 5 – Click on the shape to move it and resize it
- Move: Click on the shape, hold down and drag
- Resize: Mouse over the borders, your cursor will change (from a hand to a double arrow), click, hold down and drag
- Rotate: right-click on the square, then choose “Configuration”, change the value of “Rotation” and click on “Save”

If using a built map
Step 1 – On the admin panel, click on in the sidebar menu
Step 2 – Find your car park in the list and click on the button
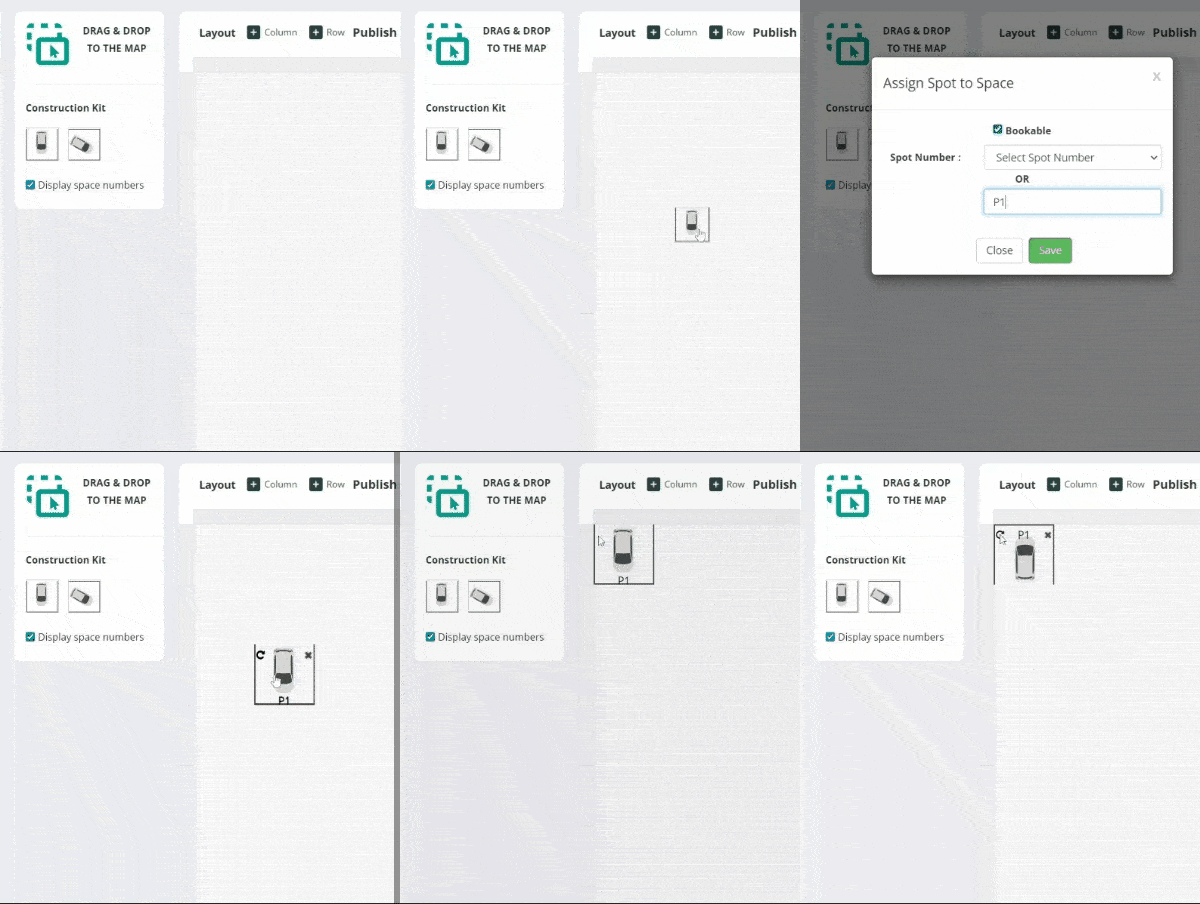
Step 3 – Drag and drop a park spot to the map (see image)
Step 4 – Give a number to your parking space (keep it short, 2-3 characters max) and click on
Step 5 – Click on the parking space to move it and rotate it
- Move: Click on the shape, hold down and drag
- Rotate: Click on the arrow in the top left corner
If not using a map
Step 1 – On the admin panel, click on in the sidebar menu
Step 2 – Click on the blue button in the top right corner
Step 3 – Select the zone your parking space belongs to
Step 4 – Give a number to your parking space (keep it short, 2-3 characters max)
Step 5 – Select the type of vehicle allowed to park in this space
- Regular Size
- Compact Size
- Large Size
- Electric Vehicle
- Motorbike
- LPG/GPL/GLP
- Accessible
- Hybrid Vehicle
Step 6 – Click on
