Prerequisites
- An iPevia controller from Castel is already in place on-site to control access
- You have an iPevia Manager account connected to your controller
Steps in iPevia Manager
Step 1 – Log in to iPevia Manager
Step 2 – Go to Software Operators > Special Users
In the navigation sidebar, go to Software operators, then click on Special users on the left side of the screen
Step 3 – Add a new API user
Then fill in the following 4 fields
- Login
- Type: Choose API
- Site: Choose the site you want to manage with Ronspot
Regarding credentials, please choose the following configuration:
- Credential: Other (hex)*
- Type (Name): pt:CUSTOM
- FormatType list: WIEGAND37
As set the CredentialIdentifier as follows:
- Credential Value : Hexadecimal
Then press

Steps in Ronspot
Step 5 – Log in to Ronspot admin panel
Step 6 – Go to Advanced Settings > Integrations
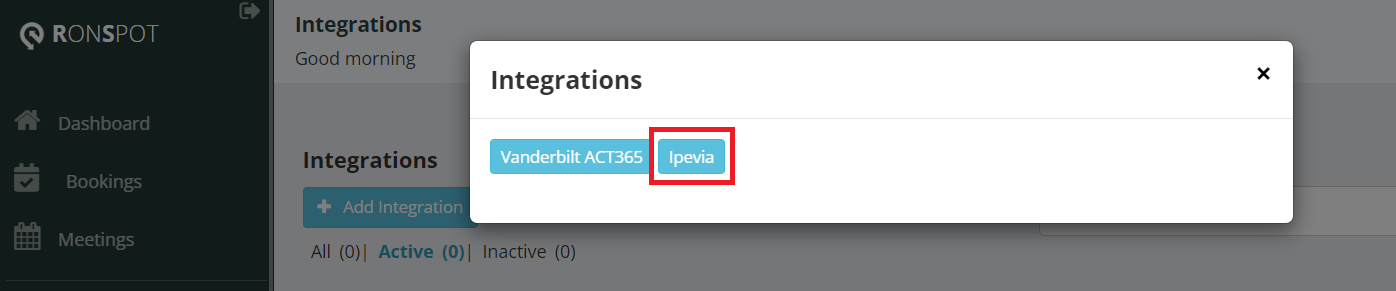
Step 7 – Add a new Ipevia integration
Click on the button at the top of the screen, then select in the pop-up window
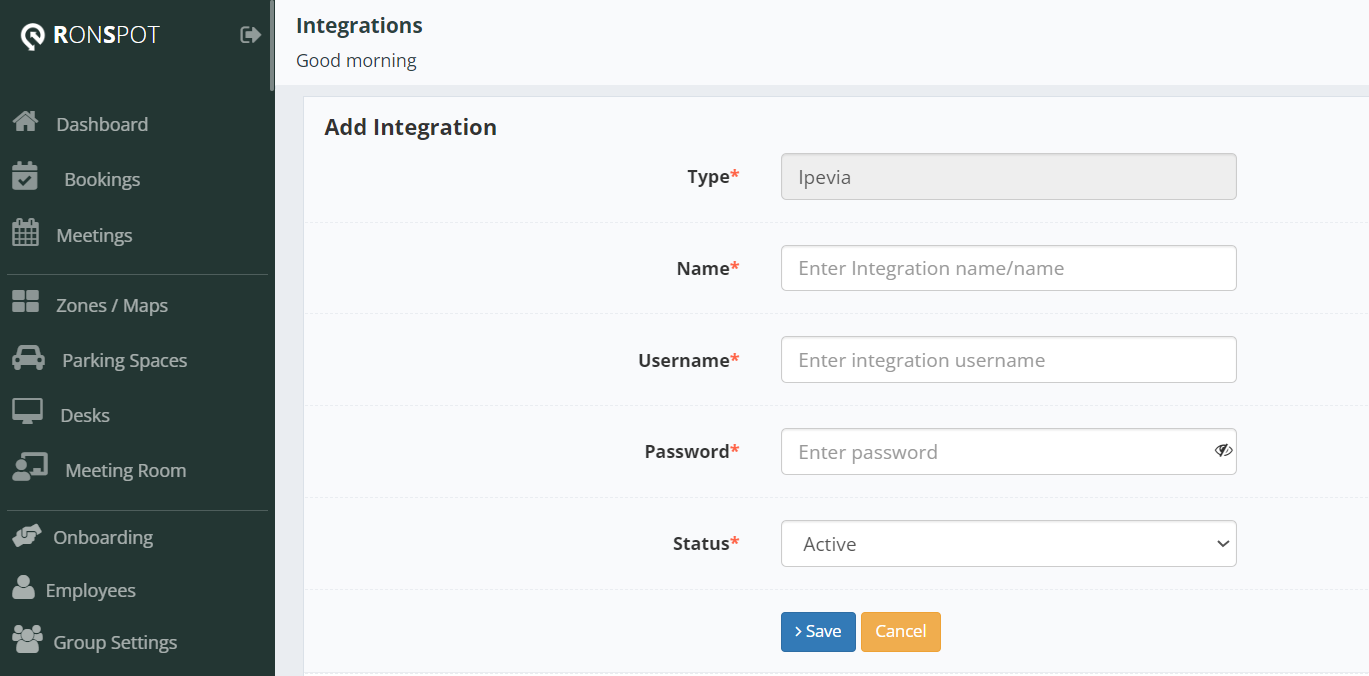
Step 8 – Configure these 4 fields
Then fill in the following 4 fields
- Name: Choose a name (for example “Ipevia Ronspot”)
- Username: Type the same username you chose in step 4
- Password: Type the same password you chose in step 4
- Status: Choose Active
Then click
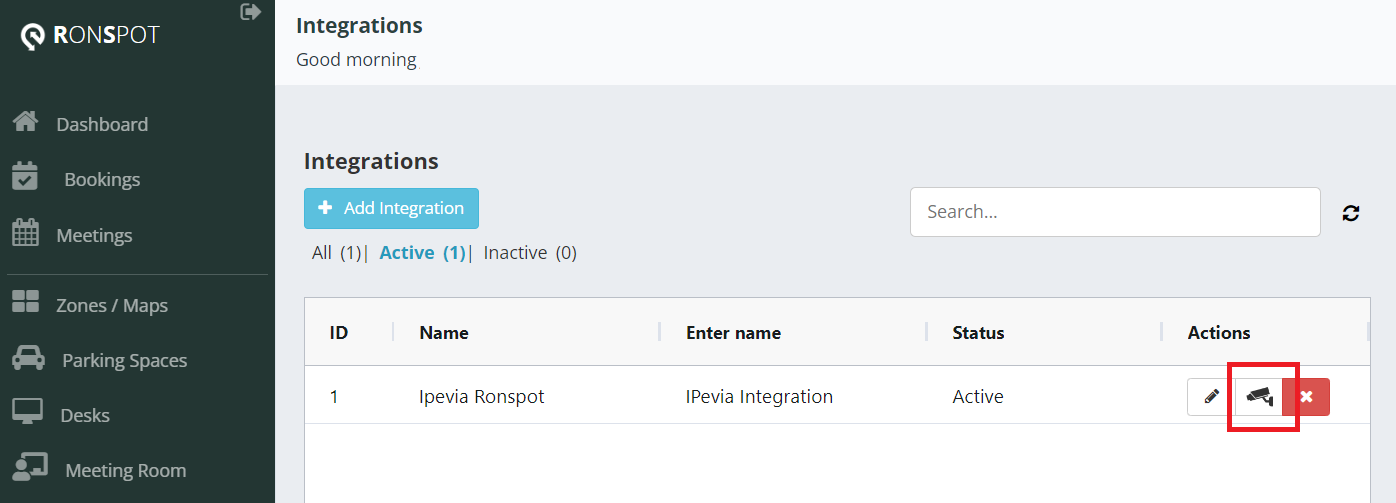
Step 9 – Then click on the camera icon
Back in the list of integrations, click on the camera icon in the Actions column
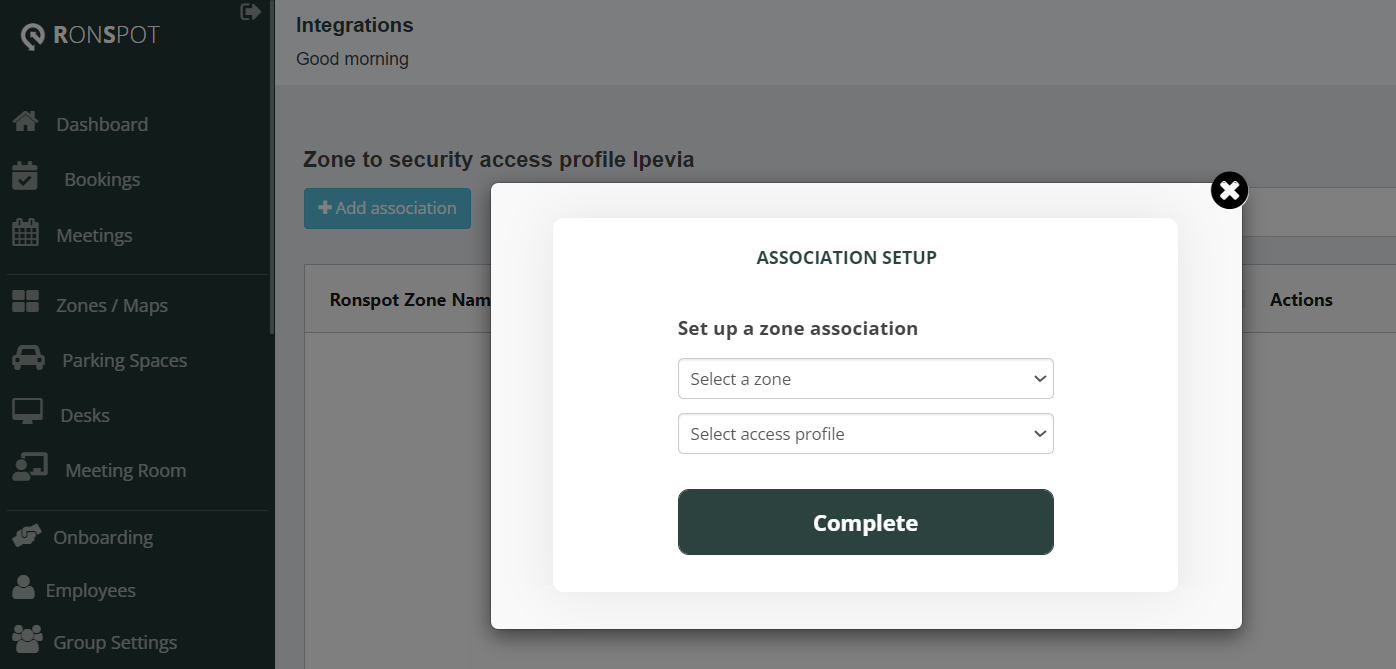
Step 10 – Add an association
Click on the button at the top of the page, then create a new association:
- Select your Ronspot zone
- Select the site configured on Ipevia Manager
Then click on the button. Repeat this step if you wish to create several associations.
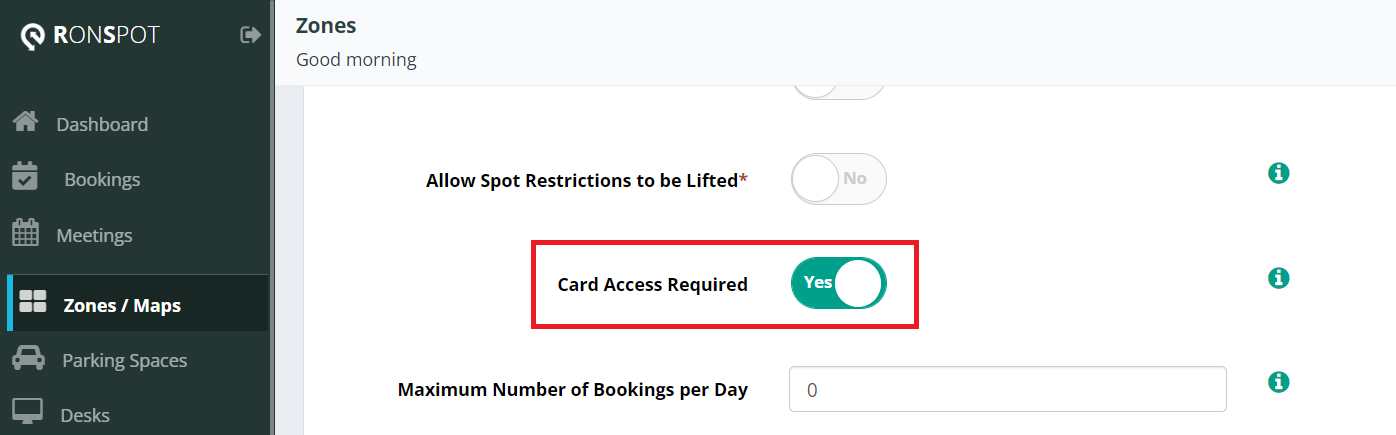
Step 11 – Go to the Zones / Maps tab and modify your zone
Step 12 – Enable the Card Access Required option
Go to the editing parameters of your zone and enable the Card Access Required option in the Bookings tab.
Step 13 – Go to the Employees tab
Step 14 – Add a card number to each employee
A new column Access Card Numbers is now visible. Add a card number to each employee.
Connection check
Step 15 – Make a booking for today
On the Ronspot employee app, make a booking for the current day
Step 16 – Check the logs on your iPevia Manager account
In the navigation sidebar, go to the penultimate tab Tools, then click on the Log sub-tab. In the second column from the left (user name), you will see all the actions performed by Ronspot (the name you chose in step 3 will appear here).