Permanent Inactive Status
Step 1 – On the admin panel, click on in the sidebar menu
Step 2 – Find the parking space you wish to make inactive, and click on the button
Step 3 – Find the Status field and switch your parking space from Active to Inactive (Permanent)
Step 4 – The inactivity period of this parking space starts by default on today’s date. If you want the inactivity period to start at a later date, click on the button, select a start date using the date picker, and click

Step 5 – Don’t forget to save the parking space settings by clicking on the button at the bottom of the page
Temporary Inactive Status
Step 1 – On the admin panel, click on in the sidebar menu
Step 2 – Find the parking space you wish to make inactive, and click on the button
Step 3 – Find the Status field and switch from Active to Inactive (Temporary)
Step 4 – Then click on the button to add an inactivity period:
- Multiple Days:
- Select No if you wish to make the parking space inactive for one day only
- Select Yes to make it inactive for several days
- Initial Date: Select the start date of the inactivity period
- End Date (if “Multiple Days” is selected):
- Select the end date of the inactivity period.
- Leave empty if you wish the inactivity period to last indefinitely.
- Repeat (if “Multiple Days” is selected):
- Select No if you don’t want any recurrence pattern
- Select Weekly to make the parking space inactive every week on the same day as the Initial Date (i.e. every Monday)
- Select Monthly to make the parking space inactive every month on the same date as the Initial Date (i.e. the 10th of every month).
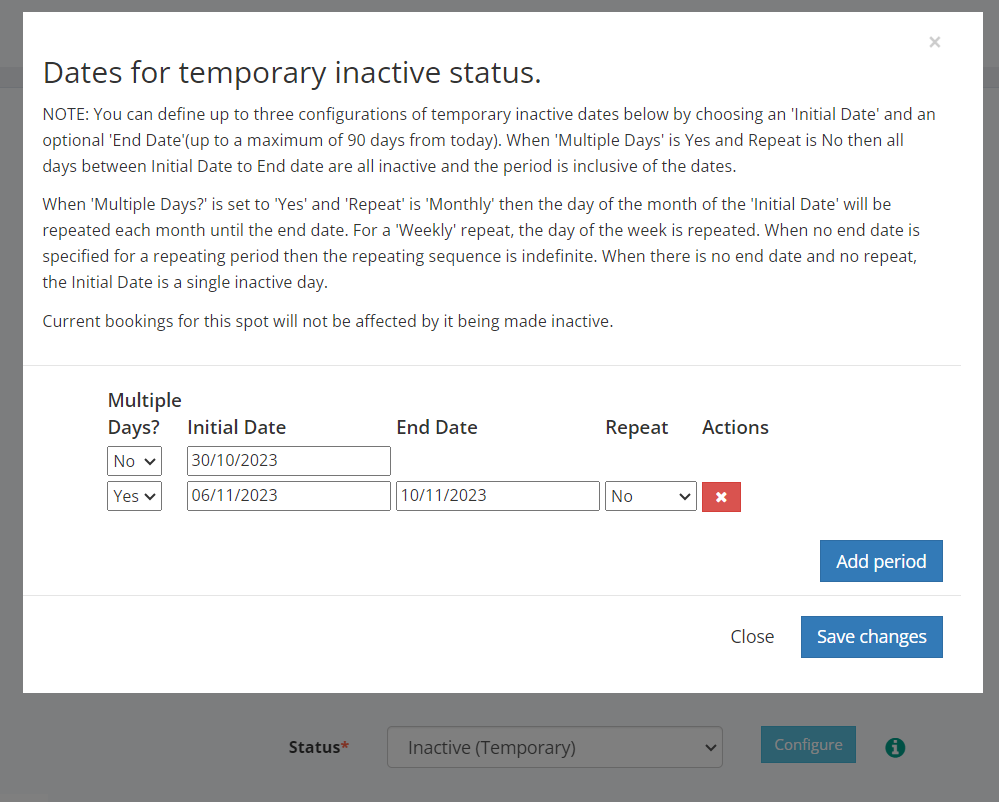
Step 5 – To add more inactivity periods (up to 3), click on the button. Then click once you have finished.
Step 6 – Don’t forget to save the parking space settings by clicking on the button at the bottom of the page