Create a parking zone

Step 1 – On the admin panel, click on in the sidebar menu
Step 2 – Click on the blue button
Step 3 – Fill out the fields (see image)
- Name: Type the name of your zone
- it can be the number of the parking floor, the street name, etc.
- the name will be visible by employees on the app, so make sure to use a recognisable name
- Type: Select Parking Zone
- Layout: Select I have a map
- Timezone: Select your local time zone for the booking time to match
- Status: Select Active
Step 4 – Click on
Upload your parking map
Step 5 – Find your parking in the list and click on the button
Step 6 – Click on , select your parking map (.jpg or .png format), and click on
Select your parking spaces
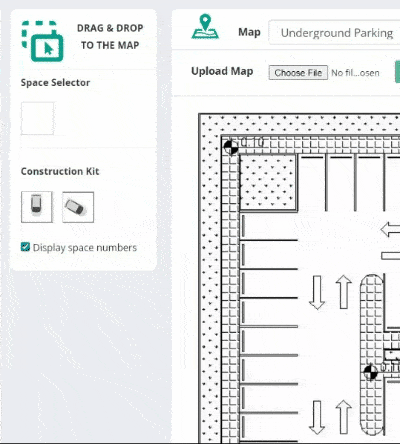
Step 7 – Drag and drop the Space Selector to the map (see image)
Step 8 – Give a number to your parking space (keep it short, 2-3 characters max) and click on
Step 9 – Click on the shape to move it and resize it
- Move: Click on the shape, hold down and drag
- Resize: Mouse over the borders, your cursor will change (from a hand to a double arrow), click, hold down and drag
- Rotate: right-click on the square, then choose “Configuration”, change the value of “Rotation” and click on “Save”
Step 10 – Repeat for the other parking spaces
Once you’re finished, don’t forget to click on Publish map at the top of the page to make the map visible to your employees